Menu
Call This Thursday to Get $50 OFF
Reliable Residential & Commercial Plumbing Services
We Are Locally Owned & Operated Plumbing Company
Call This Thursday to Get$50 OFF
Call This Thursday to Get $50 OFF
Reliable Residential & Commercial Plumbing Services
We Are Locally Owned & Operated Plumbing Company
Call This Thursday to Get$50 OFF

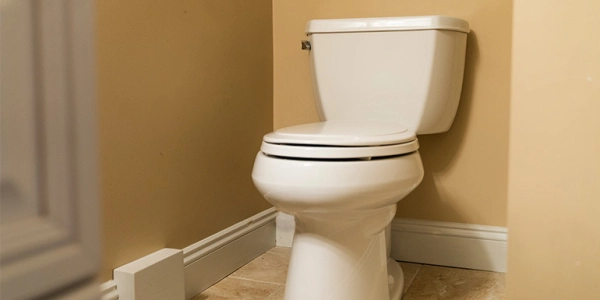
As a homeowner, knowing how to install a toilet seat is a vital skill, especially if you are fond of carrying out DIY projects. At the same time, a toilet seat can go for a long time without any sign of damage; once it starts to feel like you are sliding in the toilet, you need to hire an expert plumber. At Mr. Rooter Plumbing, we have an experienced and well-equipped team ready to help you address any toilet-related issue before it becomes too pronounced. Whether it's a cracked or stained toilet seat or too much wiggle room on the sides, a plumber can ensure that your toilet seat is in tip-top condition and free from signs of wear and tear.
Before you can start taking out the damaged toilet seat, it is crucial to ensure the area you are handling is clean. We recommend using your preferred antibacterial bathroom cleaner to sanitize the toilet seat, toilet bowl, and the surrounding hinges to avoid contact with viruses or bacteria. Once you are done cleaning the area you'll be working on, gather your supplies and tools. You will require a tape measure, toilet seat kit, adjustable wrench or pliers, flathead screwdriver, and lubricating oil.
Most toilet seats are connected to the toilet bowl with bolt caps, which can be removed by prying them with a flathead screwdriver. This is done by gently slipping it under the edge of the cap and pulling the screwdriver's handle upwards to pop it off. If your toilet seat doesn't have bolt caps, skip step one and loosen the nuts using an adjustable wrench. The nuts are located under the toilet bowl's edge and can easily be removed by tuing the wrench counterclockwise.
If the bolts are not coming out, they may be rusty or affected by grime. Lubricating oil or spray should be applied and left to sit for a few minutes before trying to remove the nuts again. You can use the adjustable wrench to hold the nuts in place while tuing the bolts with the screwdriver. Once this process is done, remove the toilet seat and old hinges to create room for the new toilet seat and its components.
Place the bolts of the new hinges into the appropriate holes with the head of the bolt pointing up. If the toilet seat kit came with washers rather than bolts, place them on the thread first before the nut. Thread the nuts tightly into each hole using your hand, and then finish off with the adjustable wrench.
We understand that not every homeowner can handle toilet seat installation and repairs, and that's why our plumber is happy to do all the heavy lifting. Contact us today at Mr. Rooter Plumbing, and schedule an appointment with the toilet repair experts.
The service provided was great, nothing to say about the work of the plumber. 5 stars to him. But the company charges felt way too much for the work. We would have liked to have the same plumber take care of other things in the house, but every time he check how much extra the company will charge for the job, the price just got too much. The plumber did an amazing job he selected a beautiful faucet to replace our old one. He did his best. But the company prices have no room for negotiation.
A million stars!!!! Steve and Lucas were absolutely amazing. My parents pipes burst and within 4 hours of calling they came and fixed everything!!! Very nice guys and dealt with my panicking. I will always use them if needed in the future and you all should too!!! Thank god for people like this!!! Thank you so much guys!!!
We got very quick service, I think the plumber actually arrived in less than an hour! After reviewing what was happening, he gave us our options and performed the option we selected. This happened in the late afternoon or early evening. It was already dark and there was a lot of snow on the ground.
I needed immediate, same day service in the early evening at my home. I went to the internet and looked up plumbing services that offered "24-hour, 7-day a week" availability. The first 3 places I called said that they could not get to me until the following day. Then I called Mr. Rooter. They were courteous and promptly got a technician to my house within an hour and a half. The technician, Lucas Kaufmann, was exceptional. The job was not easy, but he figured the problem out and got me all fixed up within an hour's time. Moving forward, I…
Despite what was quite obviously a busy day (day after Thanksgiving at 10pm) TJ came out and did not leave until the job was done! There were several setbacks, which at the late hour might have prompted him to leave- but he chose to stay and continue until the job was complete! I only have one bathroom so I was really hoping he could make it work, and he really did a wonderful job! So thankful for all of his help! I highly recommend TJ!
This is my second time using Mr. Rooter and I have to say they are an excellent company of experienced professionals! The service techs were courteous, experienced and actually spent time trying to figure out the issue before proposing the solution. They were also patient and answered all my questions without rushing the work. I will be using them again.
TJ was amazing! 10/10 recommend this company. We were in an emergency state of panic with a burst pipe in the middle of a bad snowstorm. TJ came with knowledge, professionalism, kindness, and found the root of the problem within five minutes of being here. We will be using him again in the spring to fix an outdoor issue he found!
The technicians were friendly, professional and knowledgeable. The price was too high I believe, but the technicians had no control over that. The technicians took their time and did a great job. I would use them again and also recommend them.
Excellent service! Charles and Nicholas of Mr. Rooter arrived to my scheduled service a few minutes early, wore sanitary shoe coverings, and were extremely professional. They found the source of my leak quickly and fixed the issue. While they here, I requested an additional hydraulic heating inspection which they accommodated. They were very knowledgeable and provided helpful tips. I highly recommend this team and I will definitely call them for all future plumbing needs!!
TJ came to my aid as the water pipe froze in my house. Although nothing could be done he gave me hints of what could be done my me which was very helpful. I found TJ very professional and caring about my situation. The best part of the very long night was the dogs adored him one wanted to accompany him to his next job. Thank you for employing such an amazing man. Plus today there is water running in the house. Thank you TJ and thank you Mr. Rooney plumbing for employing a man with helpful hints!!!!!
Installing a toilet seat is not a daunting, time-consuming task. However, there are several supplies and tools you need to have on hand and several other practices to ensure the job is done perfectly. If you prefer a hands-off approach, Mr. Rooter Plumbing can handle everything with the utmost professionalism.

Slab leaks are one of the most serious plumbing problems homeowners can face. Because the pipes are located beneath the concrete foundation of the home, leaks can go unnoticed for weeks or even months before obvious signs appear. Once discovered, homeowners are often faced with an important decision: should the damaged pipe be repaired directly, or is pipe rerouting the better long-term solution?
Read More
Water leaks can cause serious problems for homeowners if they are not handled quickly. From rising water bills to structural damage and mold growth, even a small plumbing issue can turn into a costly repair over time. Many homeowners hear terms like “leak detection” and “leak repair” used together, but they are actually two different plumbing services.
Read More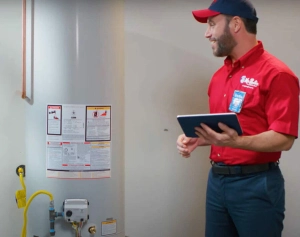
Most homeowners expect hot water to be reliable. When the temperature suddenly changes during a shower or takes longer than usual to heat up, many people assume it is just a temporary issue. However, inconsistent water temperature is often a hidden warning sign that something more serious is happening inside your plumbing system.
Read More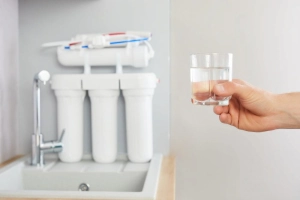
Clean, safe drinking water is something most people expect every time they turn on the tap. But have you ever stopped to wonder if your tap water is actually as safe as it should be? While municipal water systems are regulated and treated, several factors inside your home can still affect water quality. Understanding these risks and knowing when to call a professional plumber can help protect your health and your plumbing system.
Read More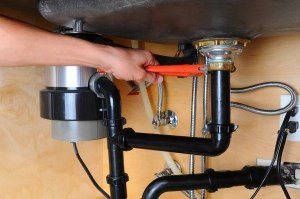
Garbage disposals are one of the most convenient features in any kitchen, but they’re often misunderstood. Many homeowners assume they can handle anything that fits down the drain. Unfortunately, that assumption can lead to serious damage and costly plumbing repair service calls. At Mr. Rooter Plumbing, we’ve seen it all when it comes to garbage disposal repair, and some of the items we’ve found inside might surprise you.
Read More
Your home’s water line is one of the most important parts of your plumbing system—yet it’s also one of the most overlooked. Hidden underground and out of sight, it quietly delivers clean water to your home every day. But when something goes wrong, the consequences can be sudden and expensive. At Mr. Rooter Plumbing, professional plumbers often see the same preventable issues again and again. Here’s what every homeowner should know about their water line.
Read More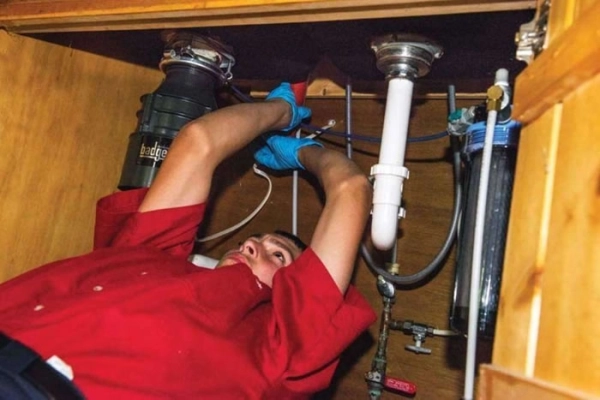
A garbage disposal is one of those kitchen features people rely on without thinking much about it. It helps manage food scraps, keeps the sink cleaner, and makes kitchen cleanup more convenient. But when a disposal starts making strange noises, draining slowly, smelling bad, or shutting off unexpectedly, it may be doing more than acting up. It may be warning you about a bigger plumbing issue.
Read More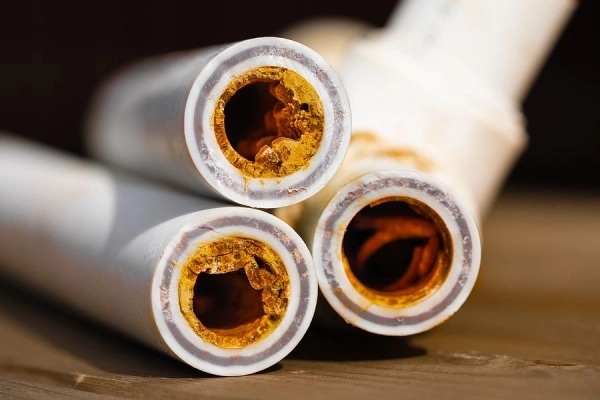
Pipes are designed to last for years, but they are not immune to wear. One of the most common reasons plumbing systems break down is corrosion. Corrosion happens slowly, often out of sight, and by the time homeowners notice a problem, the damage may already be serious. For this reason, understanding how corrosion develops can help property owners know when to call a professional plumber for inspection, plumbing repair service, or broken pipe replacement.
Read More