September 20/2023
How to Change a Dip Tube in a Water Heater
A dip tube is a long plastic tube that extends from the cold water inlet at the top of the tank to near the bottom of the tank. The role of a dip tube in a water heater is to bring in cold water and push it to the bottom of the tank, where it gets heated by the heating element or burner. Just like the other parts of a water heater, the dip tube can fail as a result of age, mineral buildup, high water pressure, and other reasons.
When a dip tube fails, it can result in reduced hot water output and efficiency because incoming cold water mixes with the hot water at the top of the tank rather than being distributed to the bottom for heating. If you notice a gradual reduction in the hot water temperature or fluctuating water temperature, it could be a sign that the dip tube is deteriorating. The good news is that changing a failing dip tube is quite easy. Here at Mr. Rooter Plumbing, we offer a comprehensive range of water heater services, including water heater installation, water heater repair, and water heater inspection. In this post, we will provide you with a step-by-step guide on how to change a dip tube.
- Step 1: Cut The Power To The Water Heater
The first step is to ensure your safety. Turn off the power to the water heater by switching off the circuit breaker or shutting down the gas supply if your heater is gas-powered. Safety should always be a top priority.
- Step 2: Turn The Cold-Water Inlet Valve Off
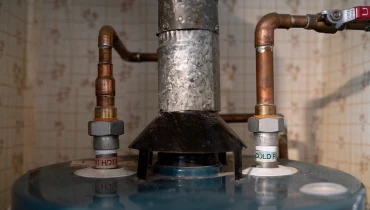
Locate the cold-water inlet valve on the water heater, usually located at the top. Turn it off to stop the flow of water into the tank.
- Step 3: Disconnect The Cold-Water Supply Line
Using a wrench, carefully disconnect the cold-water supply line that is connected to the water heater. Make sure you have a bucket or towels handy to catch any water that may drain from the line.
- Step 4: Remove The Nipple
To access the dip tube, you'll need to remove the nipple that covers it. Use a pipe wrench or pliers to carefully remove the nipple. This may require a bit of force, so be cautious.
- Step 5: Remove The Dip Tube
With the nipple removed, gently pull out the old dip tube from inside the water heater. It may be worn or deteriorated, and this is the part you'll be replacing.
- Step 6: Insert A New Tube Into The Opening
Take the new dip tube and insert it into the opening where the old one was removed. Ensure it goes in securely and fits snugly.
- Step 7: Replace The Nipple And Supply Line
Once the new dip tube is in place, reattach the nipple that covers it. Tighten it securely, but be careful not to over-tighten. Reconnect the cold-water supply line and tighten it as well.
- Step 8: Turn The Cold-Water Inlet Valve On
Finally, turn the cold-water inlet valve back on to restore the water supply to the tank. If you had turned off the power or gas, remember to turn it back on as well.
There you have it. These are the eight steps to follow to replace a dip tube in a water heater. If you have any doubts about carrying out this procedure, it’s recommended that you seek assistance from a reputable plumbing service. Here at Mr. Rooter Plumbing, we are ready to help you with all of your water heater needs, including water heater repair and replacement. Whether you need help with replacing a dip tube or it’s time to install a new water heater, our knowledgeable and experienced plumbers have what it takes to get the job done right.

